
Packing Step-by-Step
When we are preparing to go on a trip, I follow this general process in the week leading up to our departure. I hope these steps will make the packing process less overwhelming for you, and help you win the packing puzzle game!

Step 1: Choose a bag
Before I start packing, I figure out what types of bags will work best for our trip. This mainly depends on our mode of transportation. If we are flying, I limit our bags to carry-on size or smaller because I don’t want to waste time waiting at baggage claim or dealing with lost baggage. If we are taking a smaller plane, I try to limit our bag size even further, because smaller planes usually don’t have the same overhead or under-seat storage space as a larger jet. If we are going on a road trip that only involves driving, then I’m more willing to bring a suitcase… but I’ll probably have the girls share one while Sky and I share another.
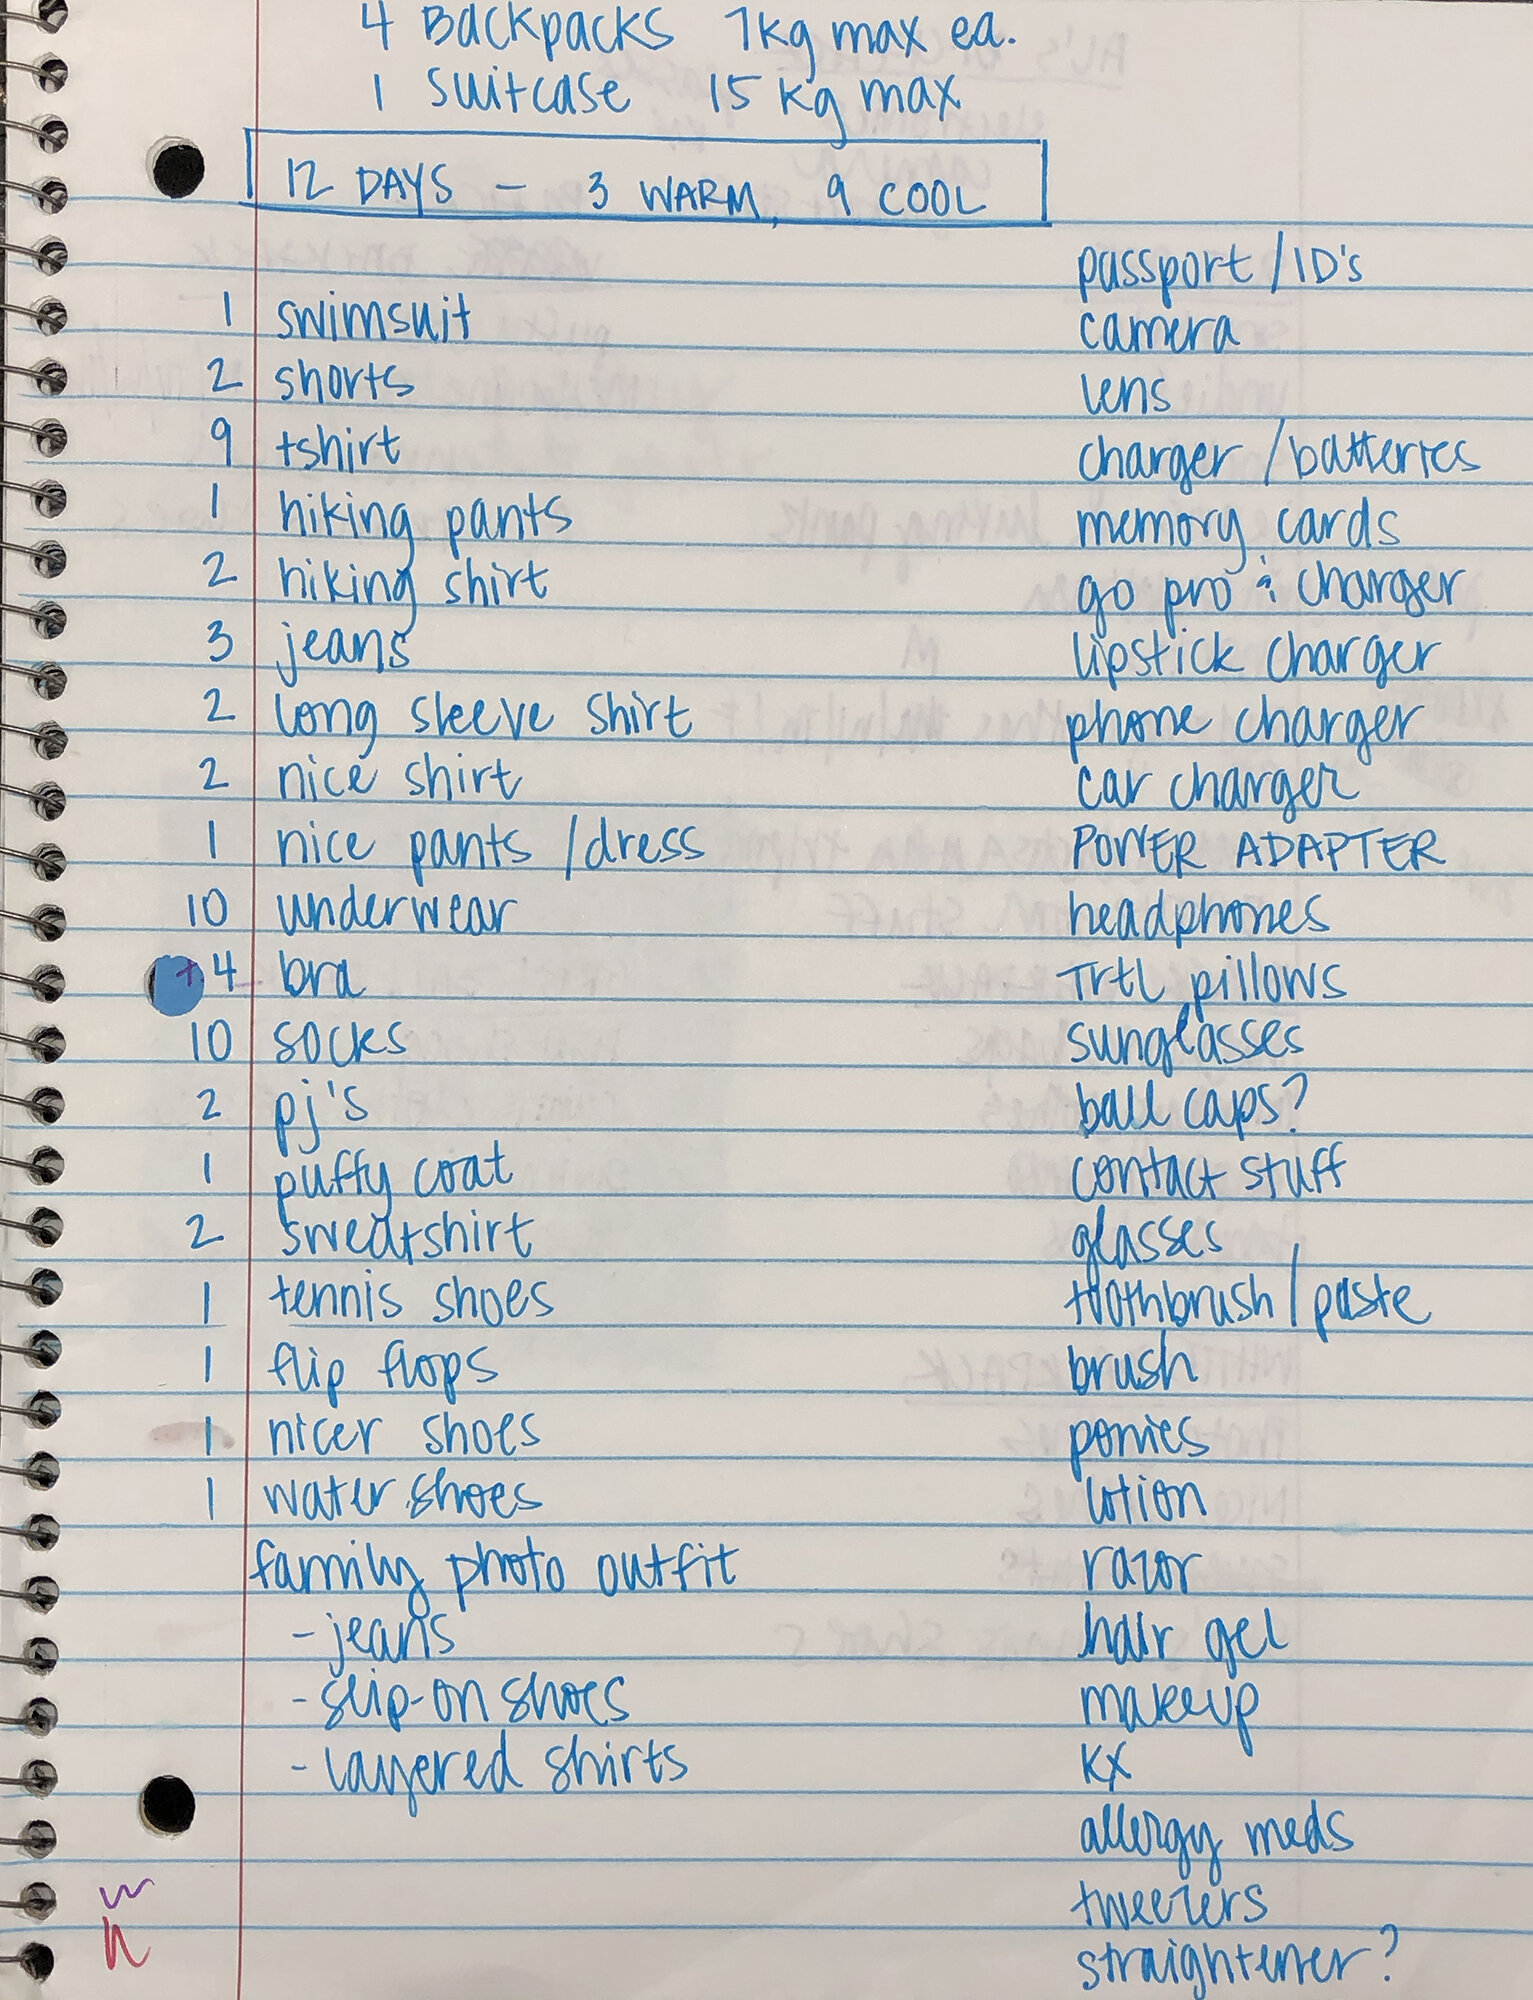
Step 2: Make a list
The next step is to make a list of the number and type of items of clothing we will likely need. I often use the following per person plan as a starting point, adding on specialty items depending on our destination:
Socks, underwear, Tshirts = 1 for each day of travel
Jeans/shorts, bra, pajamas = 1 for every 3 days of travel
Sweatshirt or comparable light jacket = 1 for every 5 days of travel
“Nice” outfit (nicer shirt/pant/skirt) = 1 for every 5 days of travel
Swimsuit = 1 for every 2 days on the beach (max 3 swimsuits)
Activewear outfit (hiking pants/tank/sports bra) = 1 for every 2 days we are planning to hike
Max 3 pairs of shoes (1 tennis/hiking, 1 flipflops/sandal, 1 versatile pair of “nice” shoes)
Minimal toiletries (for example, if we are staying at a hotel, I don’t pack shampoo or a hairdryer because most hotels provide those)

Step 3: Lay it all out
Once I have my list, then I start looking through our closets and choosing items that fit these categories AND can be mix-and-match. For example, each shirt should be able to be worn with multiple pairs of pants/shorts, or the “nice” shoes should look good with the dinner outfit as well as jeans. It helps me to lay out all of the items for one person on my bedroom floor. Then if there’s something that clearly doesn’t work with anything else, it’s easier to identify. If my kids are choosing all of their own clothes for the trip, I give them each a list of items to choose from their closets with a suggestion to mix-and-match… but if they don’t want to, that’s okay! They have their own sense of fashion :-)
Step 4: Get rid of something
This is a key step! Before I start putting anything into bags, I take a critical look at the piles of clothes on my bedroom floor and choose at least 1 thing from each person’s wardrobe to get rid of and not bring with us. Remember, the goal of the packing puzzle game is to use everything you bring, and you earn bonus points for wearing something more than once! If we are visiting family for more than a weekend, we can use their washing machine if needed. If we are staying at an AirBnB in the middle of an extended vacation, we book one with a washing machine and dryer so we can wear clothes more than once. If we’re going to the beach, we don’t need as many socks because we’ll usually wear flipflops.

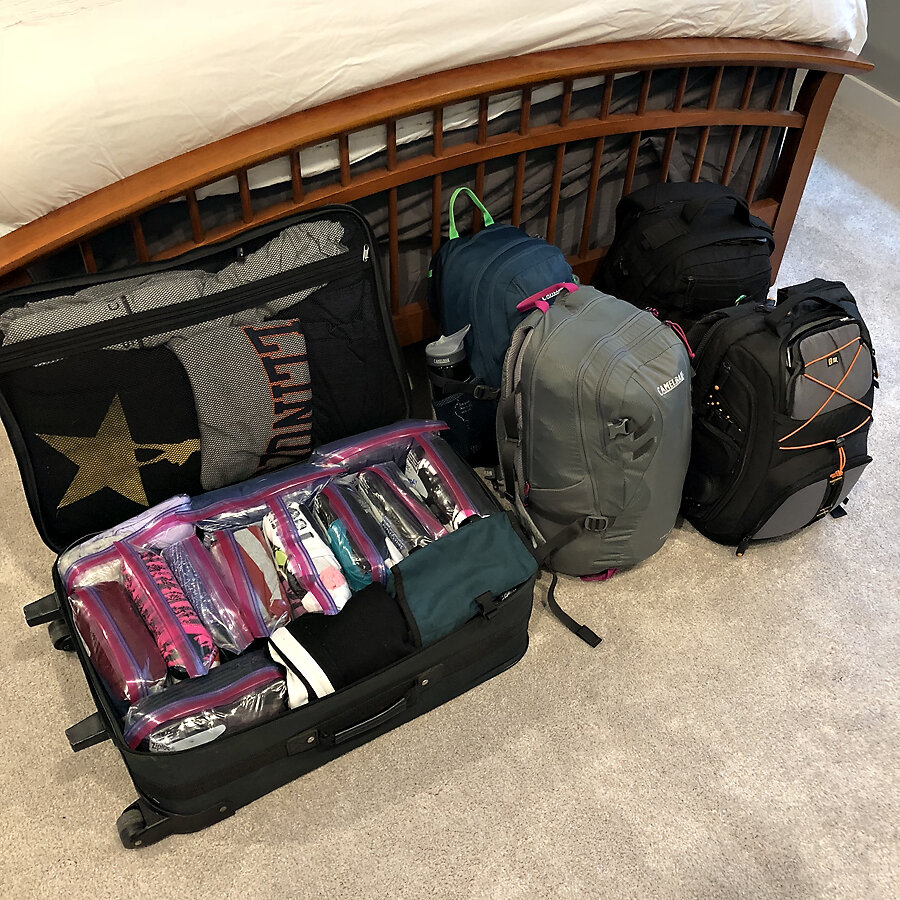
Step 5: Start packing
If you like puzzles, this is the fun part! The way I pack our bags varies depending on the type of trip and the bags we’re bringing. For both our Iceland and Australia trips, I used the daily Ziploc bag method, but how we carried the Ziplocs varied: in Iceland they all went into the suitcase and our backpacks carried snow gear, sleeping bags, shoes, and electronics; in Australia I put the daily Ziplocs in separate backpacks based on where we would be (all Cairns daily clothes were in one bag, all Sydney daily clothes in another bag, etc.). However, on shorter trips when we each carry our own backpack, then we each carry all of our own clothes in whatever compression method works best.
Step 6: Pack the extra stuff
Last, I pack toiletries, electronics, and any other extra items in the exterior pockets of our bags. I generally pack one bag of toiletries/liquids for all four of us, which also helps us get through TSA more quickly. However, we completed the TSA pre-check process last year and it was well worth the expense! If we are each carrying our own bag, then we also each carry our own electronics and entertainment for the plane/car. Our girls are old enough now to be responsible for their own items, but when they were younger I would pack all of the entertainment and snacks into one bag, so I could keep track of it all. On trips where I bring my camera backpack, I put most of the electronics in that bag and divide up my clothes between everyone else’s bags.
Bonus Step 7: Weigh your bags
If you are unfamiliar with the luggage weight restrictions for the airline you’re using, now is the time to look up that information. A few times we packed our little bags so tightly that they met the size requirements for a carry-on, but were over the weight limit. This happens more often on budget airlines or smaller planes. Take a few minutes now to weigh yourself on your bathroom scale, and then put on your fully loaded backpack and weigh yourself again. The difference is the weight of the bag - and if it’s over the limit for your airline, now is the time to either remove a few items or shift items between bags. It’s much easier to leave an item at home than rearrange your luggage or pay a fine at the airport!
Congratulations! You’re all packed and ready to go on an awesome trip. Just make sure to use everything in your bag to earn those bonus points in the packing puzzle game - and if you don’t use everything, make a note to be a little more aggressive in Step 4 the next time you’re preparing to travel.
Do you have other packing tips and tricks? I’d love to hear your ideas - share them in the comment section below!